You’ll protect your holiday decorations by storing them in plastic bins instead of cardboard boxes—they resist moisture and pests way better! Wrap fragile ornaments individually with bubble wrap and tissue paper to prevent chips and cracks. Stack heavy items on the bottom for stability, and keep everything in a cool, dry place. Label each bin by holiday and create an inventory map so you’ll know exactly what’s inside. These simple steps save you money on replacements and preserve your cherished memories for years to come. Learn the specific techniques that’ll make next year’s decorating setup faster and easier.
Why Proper Storage Prevents Damage and Saves Money

Why do so many of us pull out our holiday decorations each year only to find broken ornaments and faded lights? The answer’s simple: we’re not storing them right. Here’s the good news—you can change that! When you use labeled containers and climate-controlled storage, you’re protecting your fragile items from dust, moisture, and temperature swings that cause real damage. I’ve learned this the hard way. Proper storage isn’t just about keeping things looking nice; it saves you money on replacements. By wrapping decorations in padding materials, securing airtight lids, and organizing everything thoughtfully, you’ll extend their lifespan significantly. You’re joining countless people who’ve discovered that a little care upfront prevents damage later. Your decorations deserve protection, and so does your wallet!
Declutter Before You Pack

Before you even think about wrapping a single ornament, take a hard look at what you’ve actually got. You’ll feel lighter when you declutter ruthlessly. Create a simple decision framework: keep, donate, or regift. That broken stocking? Donate it. The ornament you’ve never loved? Pass it to a friend who will treasure it!
This purge process protects ornaments by eliminating clutter from your storage containers. You’ll pack only cherished items that deserve protection. Here’s the truth: decor you didn’t love this year won’t spark joy next season either.
Start purging now. Making quick decisions prevents procrastination and reduces stress. Your future self will appreciate the effort when unpacking becomes straightforward. Organization happens first. Smart storage follows.
Clean Decorations Before Storage

Before you pack away your decorations, take time to inspect them carefully for hidden damage like broken ornaments, frayed ribbons, or rust on metal pieces. Wipe down each item with a soft cloth to remove dust and debris, which can attract pests or cause stains during storage. Make sure everything’s completely dry, especially candles and textiles, so you won’t deal with mold or mildew when you unpack them next year!
Inspect For Hidden Damage
Getting your decorations squeaky clean before tucking them away is one of the smartest moves you can make! Now that you’ve wiped everything down, it’s time for a thorough inspection of your fragile items. Check each ornament, ribbon, and decoration carefully for cracks, breaks, or fraying. Look at metal pieces for rust spots that could worsen in storage. Watch for damage hiding in plain sight—broken bulbs tucked inside boxes are easy to miss!
This inspection prevents molds and humidity issues from worsening existing damage. If you spot problems now, you’ll replace items affordably rather than discovering ruined decorations next season. Repair what you can, set aside broken pieces for replacement, and feel confident your collection will look great again next year.
Remove Dust And Debris
Why does dust matter when you’re storing holiday decorations? Dust and debris attract pests and create stubborn stains that’ll ruin your cherished items. That’s why cleaning your decorations before storage is important!
Wipe down ornaments, figurines, and decorations with a soft cloth to remove surface grime. You’ll feel great knowing you’re protecting your treasured pieces. Don’t skip candles, artificial flowers, and textiles—make sure they’re completely moisture-free to prevent mold and mildew from developing.
I’ve learned this lesson the hard way! Taking time now saves frustration later. Address any damage like broken ornaments or frayed ribbons before packing. This cleaning and drying process reduces odor and damage risk significantly.
Your future self will thank you when you unpack everything next season looking fresh and beautiful!
Choose Plastic Bins Over Cardboard Boxes

Three key reasons make plastic bins the better choice for storing your holiday decorations: they’re tougher, they last longer, and they’ll protect what matters to you. HDPE bins resist moisture, mold, and pests that destroy cardboard boxes year after year. You’ll appreciate transparent visibility—you can spot your favorite ornaments instantly without rummaging through stacks. Tight-fitting lids seal out humidity and dust, keeping your treasures pristine. Unlike cardboard that crumbles and collapses, plastic provides durable protection that keeps your decorations intact. The stackability saves you precious space too. I’ve watched friends lose decorations to moisture damage in cardboard, and it’s heartbreaking. Investing in quality plastic bins means you’re choosing a practical solution that actually works. Your holiday memories deserve better storage.
Wrap Ornaments and Fragile Items

Wrap each ornament individually with bubble wrap, tissue paper, or soft cloth to prevent damage when you unpack next year. Choose your protective materials based on your baubles’ fragility level, as delicate ornaments need adequate cushioning to avoid chips and cracks during storage. Taking time to wrap properly now means your decorations will last through many holiday seasons.
Individual Wrapping Methods
How can you protect your most treasured ornaments from becoming casualties of storage? Ornament wrapping is your first line of defense! I’ve found that bubble wrap works wonderfully for delicate items, creating a cushioning barrier against bumps and falls. Tissue paper offers a gentler alternative, perfect for pieces with delicate finishes. Fabric scraps? They’re useful too, and you can repurpose old cloth.
Here’s my approach: wrap each ornament individually with complete coverage. This prevents direct contact between pieces, stopping chips and cracks. Skip this step at your peril—I learned that lesson the hard way! Your protection efforts pay off considerably. By taking time now, you’re preserving memories and beauty for future holidays. These simple wrapping methods make storage from risky to dependable.
Protective Material Selection
Now that you’ve got your individual wrapping strategy down, let’s talk about choosing the right materials to make that protection actually work! You’ll want quality packing materials that truly cushion your fragile ornaments. Here’s what I recommend:
- Bubble wrap for maximum shock absorption around delicate pieces
- Tissue paper as a gentle first layer protecting finishes
- Soft cloth or felt preventing scratches between items
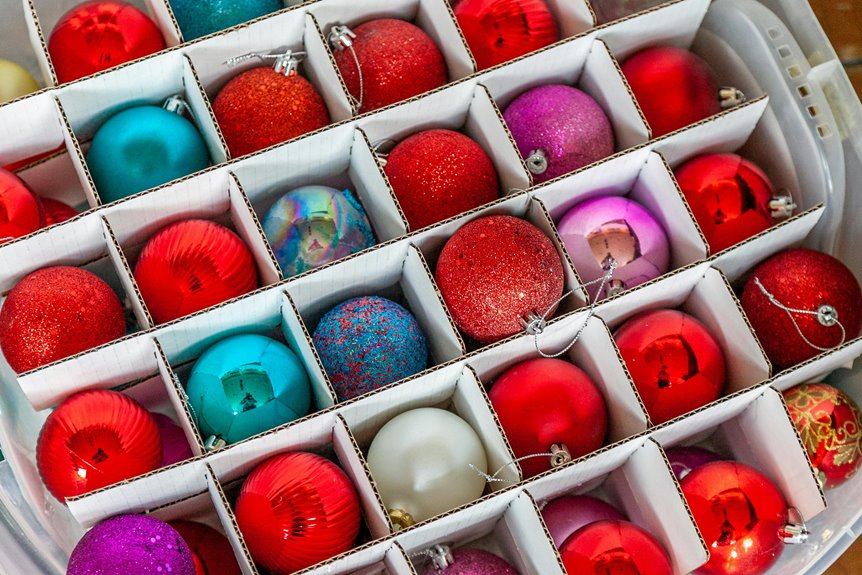
- Specialized ornament containers with built-in dividers keeping everything separated
These materials work together well. I’ve found that layering bubble wrap with tissue paper provides reliable protection. Ornament containers with dividers are particularly useful—they minimize contact between pieces naturally. Don’t forget labeling and inventory lists on your boxes! This simple step saves you from unnecessary unpacking later.
Prepare Your Storage Space: Sealing and Elevation

What keeps your decorations looking fresh year after year? Create a sealed storage environment that protects your treasures. Choose a dry location—basements and interior closets work well, but avoid damp garages or outdoor sheds. Sealed storage spaces control moisture and keep pests away, which means your ornaments stay in good condition.
Elevation matters too! Raise your storage containers off the floor using shelves or pallets. This step prevents water damage if flooding occurs and improves air circulation around your boxes. Climate stability follows when you seal your space properly, reducing humidity swings that crack delicate decorations.
Your storage area becomes a protective space for your cherished holiday memories. You’re investing in next season’s holiday celebration right now.
Wind Lights on Reels to Prevent Tangling
You’ll want to wind your lights on reels because they keep everything organized and tangle-free! When you wrap strands evenly around a reel, you’re protecting delicate bulbs from getting crushed or kinked during storage, plus you’ll avoid the frustrating mess of untangling cords next December. Reels also let you stack your lights neatly in tight spaces, making them easy to identify by length and portable enough to move around your storage area without any fuss.
Reel Organization Benefits
Have you ever wrestled with a knotted mess of tangled lights while trying to decorate? Reel organization improves your lighting storage experience! When you wind lights on reels, you’re investing in tangle-free decorating for years to come.
Here’s why reels deliver real benefits:
- Compact storage – Reels maximize space efficiency, fitting more lights into smaller areas
- Quick setup – Next year’s decoration time shrinks dramatically when lights are ready to go
- Damage prevention – Protected from crushing and bending, your lights stay functional longer
- Easy counting – You’ll instantly know which strands you have and their condition
I’ve discovered that organized reels mean less frustration and more time enjoying the season. Your future self will thank you! Reel-based lighting storage is practical and effective for seasonal decorators like us.
Preventing Tangling and Damage
Once you’ve seen the benefits of organized reels, you’re ready to master the actual winding process—because getting your lights onto those reels is where the real tangle-prevention happens! When you wind lights tightly around reels, you’re creating a protective cocoon that shields them from tangling and kinking. I’ve watched cords go from chaotic knots into neat, manageable coils.
This damage prevention strategy works because wrapped lights stay secure and separated during storage. You’re creating individual bundles that don’t interact with each other. Each reel holds your lights safely, preventing the crushing and bending that happens when cords sprawl loosely in boxes.
Your future self will appreciate this effort next holiday season. Those reels give you back precious time and frustration-free setup. You’re investing in protection today for easier decorating tomorrow!
Space Efficiency and Portability
How do you fit an entire season’s worth of lights into a small closet without creating a storage nightmare? Winding lights on reels keeps your decorations organized and ready for next year.
Here’s why reels work so well:
- They compact long strings into manageable cylinders
- They stack neatly on shelves or in bins
- They protect cords from crushing and bending
- They make portability straightforward when you’re ready to decorate
When you use reels for organized storage, you protect your lights long-term. Your lights stay untangled and damage-free. Setup becomes quick because you’ll know exactly where everything is. Once you unwind pre-organized lights, you’ll appreciate the difference compared to managing those frustrating knots.
Use Vacuum Seal Bags for Soft Decorations
Why do so many holiday decorations end up crushed or musty when you pull them out the next year? Vacuum seal bags offer effective protection for soft decorations! These bags remove air that causes moisture damage and unpleasant odors. Your plush toys, fabric ornaments, and delicate figurines stay fresh and protected for years.
Here’s what makes them practical: they reduce storage space while keeping your treasures safe. I’ve watched my closet become more organized! High-quality vacuum seal bags are moisture-resistant and durable, providing long-term protection that works. Since these bags compress items without harming their shape, you’ll store everything efficiently.
Join countless people who’ve discovered this straightforward solution. Your holiday decorations deserve better protection, and you deserve the peace of mind that comes with proper storage.
Stack Bins With Heavy Items on Bottom

The foundation of your storage tower matters more than you’d think! You’ll protect your treasures by stacking strategically. Here’s how we do it right:
- Place heavy items on the bottom first
- Layer fragile items on top where they’re safe
- Leave small gaps between bins for easy removal
- Keep frequently used decorations at accessible heights
When you stack heavy boxes underneath, you create a stable base that won’t collapse. Your delicate ornaments and lights stay protected on top, away from crushing weight. This bottom stacking method prevents damage that’d break your heart next season.
Accessible storage saves you time during setup. You won’t need to move everything around hunting for one string of lights. This smart approach means your holiday decorations stay in good condition, year after year, ready when you need them!
Group Items by Holiday and Label Everything

Ever opened a storage bin and wondered which holiday those decorations actually belonged to? You’re not alone! Grouping your holiday decorations by theme makes next year’s setup straightforward instead of a frustrating treasure hunt.
Start by sorting items into dedicated categories: Christmas, Halloween, fall, Easter, and any others you celebrate. Then, use color-coding to make identification immediate. Red bins for Christmas, orange for Halloween, pastels for Easter—you’ll know exactly what’s inside before opening anything!
| Holiday | Bin Color | Contents |
|---|---|---|
| Christmas | Red | Ornaments, lights, wreaths |
| Halloween | Orange | Decorations, props, costumes |
| Fall | Brown | Pumpkins, garland, leaves |
| Easter | Pastel | Eggs, bunnies, flowers |
| General | Clear | Tape, hooks, extension cords |
Label everything clearly on multiple sides. This storage organization method saves you time and frustration while keeping your cherished decorations exactly where you need them.
Create an Inventory Map of Your Storage

Now that you’ve sorted and labeled your bins, it’s time to create a visual map of where everything lives. This brings organization and clarity to your storage system.
Sketch your storage unit layout and assign numbers to each bin location. This simple step keeps everything organized and easy to find. Here’s what you’ll do:
- Draw your storage space on paper, marking bin positions
- Create a digital or paper inventory sheet listing contents for each numbered bin
- Record which holiday corresponds to each bin and its contents
- Update your map whenever you add or remove items
This organization system means you’ll never waste time hunting for decorations again. You’ll know exactly where your Christmas lights live and which bin holds your Halloween decorations. When decorating season arrives, you’ll have quick access to everything you need.
Maintain Cool, Dry Conditions Year-Round

Why do some decorations come out of storage looking brand new while others seem weathered and worn? The answer lies in maintaining cool, dry conditions year-round. You’ll want to choose a climate-controlled space that keeps moisture control at the forefront of your seasonal storage strategy. Avoid garages or outdoor sheds where temperature fluctuations and humidity wreak havoc on your treasures.
Invest in quality plastic bins with tight-sealing lids to shield your decorations from moisture intrusion. Make sure textiles, candles, and wreaths are completely dry before packing them away. Stable, cool environments prevent mold and material degradation that damage fragile ornaments.
These small steps make significant differences. Your decorations will benefit from this protection, and your unwrapping experience will reflect the care you’ve taken with storage.